As of Royal TS V7.3, we’ve introduced a new TOTP MFA Code Generator feature for Credentials, as well as reworked the Auto Fill configuration experience. In this tutorial, we will first show you how to configure the TOTP MFA Code Generator and then show how to use the new Auto Fill configuration experience. To demonstrate this, we will use the following website:
TOTP MFA Code Generator:
our new TOTP MFA Code Generator feature can be found in the properties of the credential under "Credentials - MFA". To use it you will need to configure "Generate" here (1):

You can configure the secret via QR Code here (2) using drag&drop, browse or even paste the secret from the clipboard. Alternatively, you can also or define it here (3). The generated MFA codes can be used in Autofills, Key Sequence tasks, etc, and can be referenced using the $MfaCode$ token. Not only that, but you can even specify the different decimal spots using $MfaCode[0]$ for more advanced scenarios.
First off, you will need to create and configure a credential object. I always being with username and password:

Once you have done that, please move to the "MFA" section of the credentials and configure the following (this can also be automated using the QR Code as mentioned earlier):

Once you have done this, save your changes by clicking on "OK", then you are ready to move on to the configuration of the Auto Fill.
Auto Fill configuration:
As mentioned in the introduction, we have created a completely new Auto Fill configuration experience in Royal TS V7.3. Previously, our Auto Fill feature was limited by the fact that the HTML parsing was done only after a web page had been downloaded. For many web pages, this was not sufficient due to the fact that the Document Object Model of the page could be changed by Java Scripts after the page had been downloaded. In addition, this also meant that web pages that were using a Secure Gateway or had a multistep login process could not be parsed correctly. We have introduced an Auto Fill configuration tool to our Ribbon in Royal TS 7.3 which not only simplifies the entire auto fill configuration process but also makes more complicated auto fill scenarios possible.
To use the new feature, first configure your newly created credential in the properties of the webpage. Next, you will need to open your webpage and then click here to configure the auto fill:
The next step if to analyze the webpage by clicking here:
Once you have done that, the can simply select the different fields using your mouse and add autofill mappings using the "+".
If you need to remove a mapping, you can do so by selecting it from the list and then clicking on the "x". If you need to change the order of your mappings, this can be done by selecting the mapping and then using the up and down arrows. To auto fill your generated MFA code, you can select it from here:

Last but not least, don't forget to configure "Click" for the "Log In" field. For this example, the following configuration worked just fine:
To save your changes, simply click on "Configure" in the Auto Fill selection in the Ribbon.
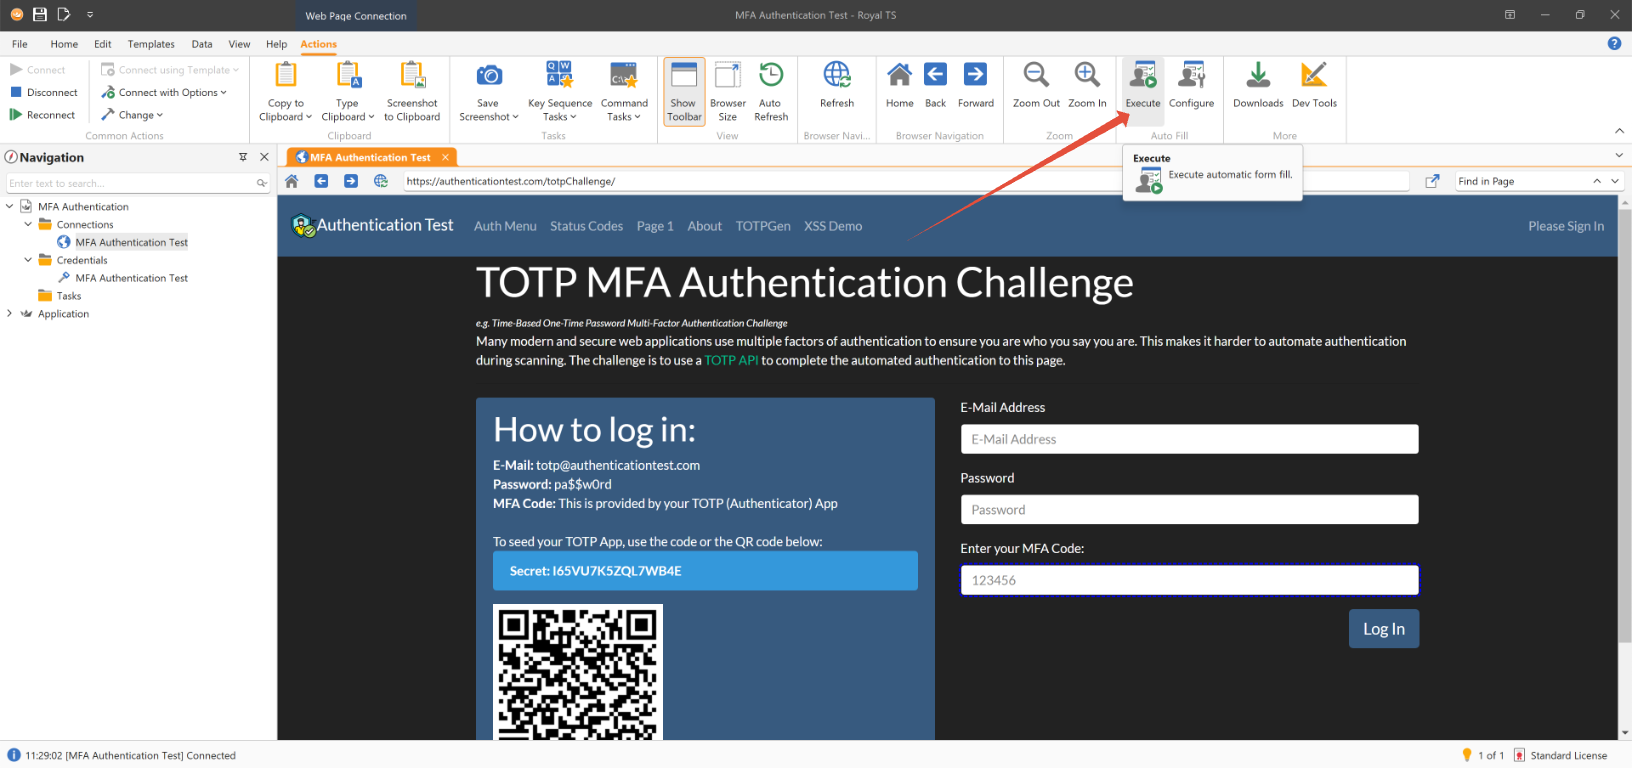
Once you have done that, you can test your Auto Fill configuration by clicking on "Execute":
If everything is configured correctly, you will be successfully logged in:

Addendum:
Since releasing this new feature, it has been brought to our attention that a handful of customers were using the RDP MFA configuration for Webpages. This "functionality" was never intended and is no longer possible as of Royal TS V7.3. We are sorry for the inconvenience that this might cause, but we were never aware of the fact that users were actually doing this. MFA can still be used in webpages, but you will need to use the $MfaCode$ replacement token in the autofill configuration
Please also note that these new features are only availible as of Royal TS V7.3. If you want to find out how to configure Auto Fills for Royal TS v7.2 and earlier, please refer to the following link:
https://support.royalapps.com/support/solutions/articles/17000144507


